앞서 필요한 프로그램을 설치하고 인증서도 발급받았습니다. 이제 Nginx 를 설정하도록 하겠습니다.
Nginx 설정
nginx 의 설정 파일은 /usr/local/etc/nginx/ 디렉토리 아래에 있습니다. 거기서 nginx.conf 파일이 설정 파일입니다.
http { } 블록은 http 서버 설정을 의미합니다.
server { } 블록은 서버 블록이라 합니다. 가상 호스트라 하기도 합니다.
설정은 include 키워드를 이용해 다른 파일을 참조할 수 있습니다. 다른 설정 파일을 참조하는 것으로 더 보기 좋고 깔끔한 설정 파일을 만들 수 있습니다.
nginx 의 자세한 설정에 대한 건 아래 링크를 참조하시길 바랍니다.
https://www.nginx.com/resources/wiki/
전역 설정 만들기
cd /usr/local/etc/nginx
설정 디렉토리로 이동한 후
rm nginx.conf
기본 설정 파일을 제거합니다. 새로 만드는 것이 더 편하기 때문입니다.
mkdir options otherconf conf.d
각각 공통 설정 파일, 특수한 설정 파일, server 블록 파일이 저장될 디렉토리입니다.
vi nginx.conf
Nginx 전역 설정 파일을 만들어 줍니다.
user www;
worker_processes  auto;

pid /var/run/nginx.pid;

load_module "/usr/local/libexec/nginx/ngx_http_modsecurity_module.so";

events {
    use kqueue;
    worker_connections 1024;
}

http {
    include       mime.types;
    default_type  application/octet-stream;

    # Basic settings
    # ----------
    charset UTF-8;

    sendfile        on;
    tcp_nopush     on;
    tcp_nodelay     on;
    reset_timedout_connection on;
    keepalive_requests 1000;
    send_timeout 30;
    server_names_hash_max_size 2048;

    keepalive_timeout  65;

    server_tokens off;

    access_log off;
    log_not_found off;
    error_log /var/log/nginx/error.log;

    server {
    listen       80 default_server;
    server_name  ~.;
    root /nonexistent;

    return 301 https://$host$request_uri;
    }

    # Virtual host config
    # ----------
    include     conf.d/*;
}
worker_processes auto; 몇 개의 프로세스가 동작할지 설정합니다. auto 로 설정하면 코어 수만큼 프로세스가 동작합니다.
load_module “/usr/local/libexec/nginx/ngx_http_modsecurity_module.so”; modsecurity 모듈을 로드한 것입니다.
use kqueue; kqueue 라는 FreeBSD 의 스레드 처리 방식을 사용합니다.
worker_connections 1024; 한 개의 프로세스가 몇 개의 연결을 받을지 설정하는 것입니다.
server_names_hash_max_size 2048; nginx 에서 처리 가능한 호스트의 최대 갯수를 설정합니다. 넉넉하게 설정했습니다.
access_log off 엑세스 로그를 끕니다. 엑세스 로그는 각 서버 블록에 따로 설정하는 것이 로그 관리에 도움이 됩니다.
log_not_found off 파일을 찾지 못했다는 로그를 기록하지 않습니다. 많이 생기는데 별로 쓸모가 없거든요. 로그 파일 더러워지기만 하고.
server {
    listen       80 default_server;
    server_name  ~.;
    root /nonexistent;

    return 301 https://$host$request_uri;
}
이 부분은 80 포트 (http) 로 들어온 연결을 https 연결로 재설정 하는 것입니다.
listen 80 default_server; 80포트를 듣는 기본 서버입니다.
server_name ~.; 모든 서버 이름을 의미합니다.
root /nonexistent; 존재하지 않는 디렉토리를 선택한 것입니다. 보안상 좋습니다.
return 301 https://$host$request_uri; 요청한 호스트 ($host) 의 요청한 url ($request_uri) 로 영구적 리다이렉트 (301) 시킵니다.
include conf.d/*
conf.d 아래의 모든 파일을 포함합니다.
공통 설정 작성
다음은 공통 설정을 만들 차례입니다.
SSL 설정
SSL 또는 TLS, 일명 https 통신을 위한 설정입니다.
dhparam 만들기
dhparam 은 키 교환시 디피-헬만 키 교환 방식을 사용하기 위해 필요한 디피-헬만 키 파일입니다.
mkdir /usr/local/etc/cert
/usr/local/bin/openssl dhparam -out /usr/local/etc/cert/dhparam.pem 4096
만드는데 수십초~수십분까지 걸릴 수 있습니다.
SSL 설정 파일 작성
vi /usr/local/etc/nginx/options/ssl.conf
ssl_certificate      /usr/local/etc/letsencrypt/live/example.com/fullchain.pem;
ssl_certificate_key  /usr/local/etc/letsencrypt/live/example.com/privkey.pem;
ssl_trusted_certificate     /usr/local/etc/letsencrypt/live/example.com/chain.pem;
ssl_dhparam /usr/local/etc/cert/dhparam.pem;

ssl_session_cache    shared:SSL:20m;
ssl_session_timeout  10m;

ssl_ecdh_curve secp521r1:secp384r1;
ssl_session_tickets off;
ssl_stapling on;
ssl_stapling_verify on;
resolver 1.1.1.1 1.0.0.1 valid=300s;
resolver_timeout 5s;

ssl_protocols TLSv1 TLSv1.1 TLSv1.2 TLSv1.3;
ssl_ciphers ECDHE-ECDSA-AES128-GCM-SHA256:ECDHE-RSA-AES128-GCM-SHA256:ECDHE-ECDSA-AES256-GCM-SHA384:ECDHE-RSA-AES256-GCM-SHA384:ECDHE-ECDSA-CHACHA20-POLY1305:ECDHE-RSA-CHACHA20-POLY1305:DHE-RSA-AES128-GCM-SHA256:DHE-RSA-AES256-GCM-SHA384:DHE-RSA-CHACHA20-POLY1305:ECDHE-ECDSA-AES128-SHA256:ECDHE-RSA-AES128-SHA256:ECDHE-ECDSA-AES128-SHA:ECDHE-RSA-AES128-SHA:ECDHE-ECDSA-AES256-SHA384:ECDHE-RSA-AES256-SHA384:ECDHE-ECDSA-AES256-SHA:ECDHE-RSA-AES256-SHA:DHE-RSA-AES128-SHA256:DHE-RSA-AES256-SHA256:AES128-GCM-SHA256:AES256-GCM-SHA384:AES128-SHA256:AES256-SHA256:AES128-SHA:AES256-SHA:DES-CBC3-SHA;

ssl_prefer_server_ciphers  on;
Nginx SSL 문서 를 참고하시면 좋습니다.
TLSv1.1 이하는 사용하지 않는 것이 권장되지만, 구형 웹 브라우저를 사용하는 사람들이 많은 관계로 일단 켜 두었습니다. 필요하지 않다면 제거하면 됩니다.
SSL ciphers 는 아래 두 사이트를 참고해서 구성하시면 됩니다.
https://ssl-config.mozilla.org/#server=nginx
보안 설정
ModSecurity3 설정
vi /usr/local/etc/modsecurity/modsecurity.conf
modsecuriy3 의 설정 파일을 열고
SecRuleEngine DetectionOnly 을
SecRuleEngine On 으로 바꿔 주세요.
감지만 하기 -> 차단하기 로 변경한 것입니다.
unicode.mapping 파일 받기
fetch https://raw.githubusercontent.com/SpiderLabs/ModSecurity/v3/master/unicode.mapping -o /usr/local/etc/modsecurity/unicode.mapping
Modsecuriy3 공식 페이지에서 unicode.mapping 파일을 받았습니다.
Security 설정 파일 작성
vi /usr/local/etc/nginx/options/security.conf
#security header
    add_header X-Frame-Options "SAMEORIGIN";
    add_header Strict-Transport-Security max-age=31536000;
    add_header X-Content-Type-Options nosniff;
    add_header X-XSS-Protection "1; mode=block";

#hide header
    proxy_hide_header X-Powered-By;

#enable modsecurity
    modsecurity on;
    modsecurity_rules_file /usr/local/etc/modsecurity/modsecurity.conf;
보안 헤더를 추가하고, 서버 정보(php 같은) 가 담긴 헤더를 숨기고, ModSecuriy3 를 활성화하는 옵션입니다.
ModSecurity3 가 어떠한 요청을 차단할 시 nginx 의 에러 로그에 로그를 남깁니다.
모든 보안 프로그램이 그러하듯 ModSecurity3 도 오진을 할 수 있습니다. 어떠한 서비스가 동작하는데 오류가 난다면 리버스 프록시의 에러 로그를 확인해 보시길 바랍니다. ModSecuriy3 가 오진을 해서 생기는 문제일 수도 있습니다. 만약 그럴 경우, ModSecurity 를 필요한 부분에서 off 해 주면 됩니다.
압축 설정
vi /usr/local/etc/nginx/options/gzip.conf
gzip on;
gzip_static on;
gzip_types text/plain text/css text/javascript text/xml application/x-javascript application/javascript application/xml application/json image/x-icon;
gzip_comp_level 9;
gzip_buffers 16 8k;
gzip_proxied expired no-cache no-store private auth;
gzip_min_length 1000;
gzip_disable "msie6"
gzip_vary on;
txt 파일이나 css, 자바스크립트 파일 등 압축이 잘 되는 파일들을 압축하도록 설정함으로서 페이지 로딩 속도를 빠르게 할 수 있습니다.
기타 설정 작성
기타 설정들은 proxy 설정과 같은 공통적으로 사용되지는 않지만 여러 서버 블록에서 사용할 수 있는 설정들입니다.
vi /usr/local/etc/nginx/otherconf/proxy.conf
proxy_pass_header Server;
proxy_redirect off;
proxy_set_header Host $http_host;
proxy_set_header  X-Real-IP $remote_addr;
proxy_set_header X-Scheme $scheme;
proxy_set_header  X-Forwarded-For $proxy_add_x_forwarded_for;
proxy_buffering off;
proxy_http_version 1.1;
리버스 프록시에 관한 설정입니다.
테스트하기
테스트 서버 블록 만들기
vi /usr/local/etc/nginx/conf.d/main.conf
server {
    listen      443 ssl http2;
    root /usr/local/www/nginx;
    server_name main.example.com;
    include /usr/local/etc/nginx/options/*;
    access_log /var/log/nginx/main/access.log;
    location / {
        index   index.html index.htm;
    }
}
테스트를 위해 Main 이라는 서버 블록을 만들었습니다. nginx 기본 페이지를 불러 오도록 설정하였습니다.
listen 443 ssl http2;
443 포트를 청취하고, SSL 을 사용하며 http2 를 지원합니다.
root /usr/local/www/nginx;
이 서버 블록의 루트 디렉토리는 /usr/local/www/nginx 입니다.
server_name main.example.com;
서버의 이름 (도매인)은 main.example.com 입니다.
include /usr/local/etc/nginx/options/*;
/usr/local/etc/nginx/options/ 아래 모든 파일을 포함합니다.
로그 디렉토리 만들기
mkdir /var/log/nginx/main
Main 의 엑세스 로그가 저장될 디렉토리를 만들었습니다.
Nginx 문법 검사
Nginx 의 설정이 끝났습니다. 문법 검사를 해 보도록 하겠습니다.
nginx -t
nginx: the configuration file /usr/local/etc/nginx/nginx.conf syntax is ok
nginx: configuration file /usr/local/etc/nginx/nginx.conf test is successful
위와 같은 메세지가 출력되면 검사를 통과한 것입니다. 무언가 잘못되었다면 어디가 잘못되었는지 알려 주고 test failed 라는 문구를 출력합니다.
Jail 시작시 Nginx 자동 시작
sysrc nginx_enable=YES
Nginx가 자동으로 시작되도록 설정하였습니다.
Nginx 시작
service nginx start
Nginx 서비스를 시작하였습니다.
포트포워딩
- 외부 포트 80 <-> Nginx_WAF 의 80 포트
- 외부 포트 443 <-> Nginx_WAF 의 443 포트
로 연결해 줍니다. Nginx_WAF 감옥에 연결해야 합니다. FreeNAS의 IP에 연결하면 안됩니다.
접속
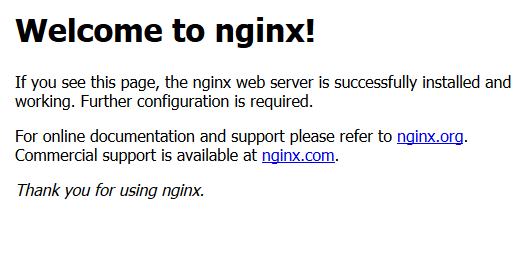
이후 main.example.com 으로 접속하였을 때 아래와 같은 페이지가 나타나면 정상적으로 된 것입니다.
TLS 1.3 확인하기
TLS 1.3 을 사용하는 지 확인하는 방법은 아래와 같습니다.
- 크롬의 경우 F12를 눌러 개발자 메뉴를 열고, 오른쪽 상단의 >> 를 눌러 Security 에서 확인 가능하고
- firefox 의 경우는 주소표시줄의 초록자물쇠를 누른 뒤 > 를 누르고 ‘더 보기’ 를 클릭하면 확인할 수 있습니다.
modsecurity 작동 확인
간단한 테스트 룰을 만들어 확인할 수 있습니다.
vi /usr/local/etc/modsecurity/test.conf
Include "/usr/local/etc/modsecurity/modsecurity.conf"
SecRule ARGS:testparam "@contains test" "id:1234,deny,status:403"
테스트 룰을 만들었습니다. 이어서 security.conf 도 수정하겠습니다.
vi /usr/local/etc/nginx/options/security.conf
modsecurity_rules_file /usr/local/etc/modsecurity/modsecurity.conf; 를
modsecurity_rules_file /usr/local/etc/modsecurity/test.conf; 으로 바꿔 주세요.
그 다음 저장해줍니다.
그 다음 nginx 를 재시작합니다.
nginx -s reload
그 후 브라우저에서 https://서버주소//?testparam=test 를 입력하였을 때, 403 Forbidden 이 나타나면 정상적으로 적용된 것입니다.
ModSecurity의 테스트트를 끝내기 위해서는 역순으로 하면 됩니다.
security.conf 를 원래대로 되돌리고, test.conf 를 삭제한 후 nginx 를 재시작 해 주면 됩니다.
마치면서
다음 포스팅은 Fail2Ban 을 적용하는 것에 대해 다룹니다.